
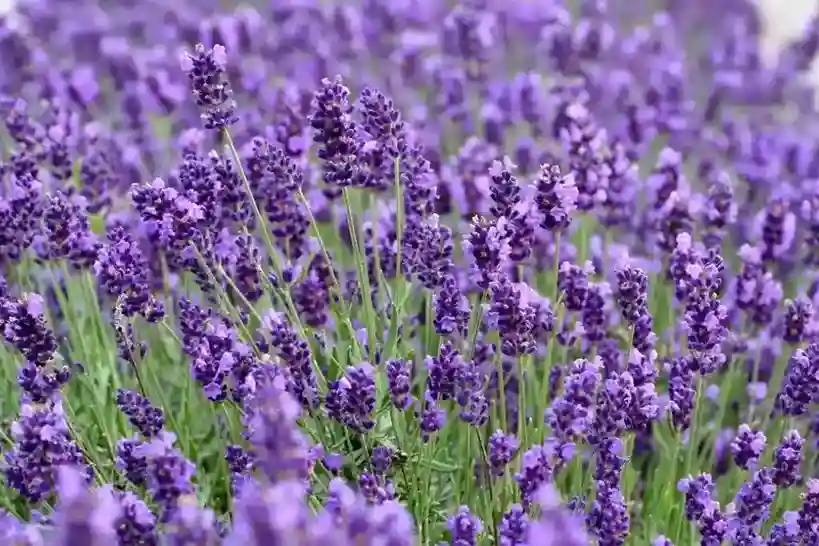
lavender care, with its soothing fragrance and stunning purple blooms, is a favorite among gardeners and plant enthusiasts. Known for its versatility and resilience, lavender can thrive in various environments, making it a popular choice for gardens, balconies, and indoor spaces. This comprehensive guide will walk you through the essential steps to grow and care for lavender, ensuring your plants remain healthy and vibrant.
Choosing the Right Lavender Variety
Before diving into the care tips, it’s important to select the right variety of lavender for your needs. Some popular varieties include:
- English Lavender (Lavandula angustifolia): Known for its strong fragrance and narrow leaves, it is hardy and ideal for cooler climates.
- French Lavender (Lavandula dentata):</strong> Recognizable by its toothed leaves and distinctive aroma, it thrives in warmer regions.
- Spanish Lavender (Lavandula stoechas): With its unique rabbit-ear bracts atop the flower spikes, it prefers hot, dry conditions.
Planting Lavender
Lavender thrives in well-draining soil and full sunlight. Here are the key points to consider when choosing a location and preparing the soil:
- Sunlight: Select a spot that receives at least 6-8 hours of direct sunlight daily. Lavender needs plenty of light to grow robustly and produce abundant flowers.
- Soil: Lavender prefers slightly alkaline to neutral pH soils (around 6.5 to 7.5). Ensure the soil is well-draining to prevent root rot.
- Amendments: If your soil is heavy clay or poorly draining, amend it with sand or gravel to enhance drainage. This will help the roots stay healthy and avoid waterlogging.
let’s start:
1. Timing: The timing of planting sets the stage for successful establishment. Choose to transplant your lavender during the spring or early summer months, post the threat of frost. This strategic timing aligns with the plant’s natural growth cycle, allowing it to acclimate to its new environment and establish strong roots before facing the challenges of cooler weather.
2. Spacing: Providing ample space between lavender plants is paramount for fostering robust growth and maximizing their potential. Aim to space each plant approximately 12 to 18 inches apart. This generous spacing not only allows for unhindered root expansion but also promotes optimal airflow around the foliage. Improved air circulation reduces the risk of fungal diseases and enhances overall plant vigor.
3. Depth: When transplanting lavender into the garden soil, attention to planting depth is crucial for ensuring long-term health and vitality. Plant the lavender at the same depth it was in its nursery pot, taking care not to bury the crown—the junction where the stem meets the roots—too deeply. A shallow planting depth encourages healthy root development and minimizes the risk of moisture-related issues such as root rot. Position the crown slightly above the soil level to promote proper drainage and prevent water accumulation around the plant’s base.
And so:
4. Soil Preparation: Before planting lavender, prepare the soil to create an optimal growing environment. Lavender thrives in well-draining soil with a slightly alkaline to neutral pH (around 6.5 to 7.5). Amend the soil as needed, incorporating organic matter such as compost to improve drainage and fertility. Additionally, consider adding sand or gravel to heavy clay soils to enhance permeability and prevent waterlogging.
5. Sun Exposure: Lavender is a sun-loving plant that thrives in full sunlight. Select a planting location that receives at least 6 to 8 hours of direct sunlight daily to ensure vigorous growth and prolific blooming. Avoid shaded areas or locations with inadequate sunlight, as they can hinder the plant’s development and diminish flower production.
By meticulously following these comprehensive planting guidelines, you can create an ideal environment for your lavender plants to thrive and flourish. With proper care and attention, your lavender garden will become a fragrant oasis, captivating the senses and enriching your outdoor space with its beauty and charm.
By choosing the right location and following proper planting techniques, you can help your lavender plants thrive and produce beautiful, fragrant blooms.
Watering Lavender
Lavender is known for its drought tolerance once established, but proper watering is crucial during its initial growth phase to ensure healthy development.
Establishment Phase
In the early stages of growth, newly planted lavender requires careful attention to establish strong roots and ensure healthy development.
- Frequency: Watering frequency is crucial during this phase. Aim to water the lavender once or twice a week to maintain consistent moisture levels in the soil. However, avoid overwatering, as excessively damp soil can lead to root rot and other issues.
- Amount: When watering, it’s essential to strike a balance. Ensure that the soil is moist but not waterlogged. Deep watering is beneficial as it encourages the roots to grow downwards, promoting a sturdy root system. Shallow watering may result in shallow root growth, which can make the plant more susceptible to drought stress.
- Duration: The establishment phase typically lasts for one growing season. It’s essential to continue this watering schedule throughout this period to support the lavender’s growth and development. As the plant becomes more established, it will become more resilient to drought conditions.
During this phase, monitor the soil moisture regularly. Adjust the watering frequency and amount based on environmental factors such as temperature, humidity, and rainfall. By providing consistent and appropriate watering, you’ll help your lavender plants establish a strong foundation for future growth and vitality.
Mature Plants
Once established, lavender thrives with minimal watering and prefers drier conditions.
- Frequency: Water deeply but infrequently. A good rule of thumb is to water every two to three weeks during dry periods.
- Soil Condition: Allow the soil to dry out completely between waterings. Lavender does not tolerate consistently wet soil and can develop root rot if overwatered.
- Monitoring: Check the soil moisture by inserting your finger a couple of inches into the soil. If it feels dry at that depth, it’s time to water.
Fertilizing Lavender
Lavender does not require heavy fertilization. Over-fertilizing can lead to excessive foliage growth at the expense of flowers.
- Initial Planting: Mix a small amount of balanced, slow-release fertilizer into the soil at planting time.
- Ongoing Care: An annual application of compost or a light dose of balanced organic fertilizer in the spring can help maintain soil fertility.
Pruning Lavender
Regular pruning helps maintain a healthy, attractive shape and encourages prolific blooming.
- Annual Pruning: In late summer or early fall, after the main flowering period, prune lavender back by about one-third to half its height. Avoid cutting into the woody part of the stems, as this can harm the plant.
- Maintenance Pruning: Lightly trim any dead or damaged branches in the spring.
Lavender is known for its drought tolerance once established, but proper watering is crucial during its initial growth phase to ensure healthy development.
Establishment Phase
During the initial growth phase, newly planted lavender requires consistent watering to develop a strong root system.
- Frequency: Water the lavender once or twice a week.
- Amount: Ensure the soil is moist but not waterlogged. Water deeply to encourage roots to grow downwards.
- Duration: Continue this watering schedule until the plants are established, which typically takes one growing season.
Mature Plants
Once established, lavender thrives with minimal watering and prefers drier conditions.
- Frequency: Water deeply but infrequently. A good rule of thumb is to water every two to three weeks during dry periods.
- Soil Condition: Allow the soil to dry out completely between waterings. Lavender does not tolerate consistently wet soil and can develop root rot if overwatered.
- Monitoring: Check the soil moisture by inserting your finger a couple of inches into the soil. If it feels dry at that depth, it’s time to water.
Harvesting Lavender
Harvesting lavender is a rewarding process that serves both decorative and practical purposes, such as crafting, cooking, and making essential oils. Here’s a detailed guide on how to harvest lavender to ensure the best results.
Timing
The timing of your lavender harvest is crucial for maximizing fragrance and oil content. The best time to harvest lavender is when about half of the flower buds have opened. This stage strikes the perfect balance, providing blooms that are both visually appealing and rich in essential oils. For most lavender varieties, this typically occurs in late spring to early summer.
Method
To harvest lavender properly, follow these steps:
- Preparation: Gather your tools, which should include sharp, clean scissors or pruning shears. Clean tools help prevent the spread of disease and ensure clean cuts.
- Morning Harvest: Plan to cut the flower spikes early in the morning. This timing is ideal because the essential oils in the lavender are at their peak concentration after the dew has dried but before the heat of the day causes the oils to dissipate.
- Cutting the Stems:
- Select flower spikes with buds that are about half-open.
- Cut the stems about 1-2 inches above the woody part of the plant. This encourages healthy regrowth and prevents the plant from becoming too woody.
- Make clean, angled cuts to avoid damaging the plant.
- Handling the Harvest:
- Gently gather the cut stems into small bunches.
- Secure the bunches with rubber bands or string. As the lavender dries, the stems will shrink, and the rubber bands will keep the bunches tight.
Post-Harvest Care
After harvesting, you have a few options for using your lavender:
- Drying:
- Hang the bunches upside down in a dark, dry, and well-ventilated area. This preserves the color and fragrance.
- Alternatively, you can lay the stems flat on a screen or drying rack.
- Using Fresh:
- Fresh lavender can be used in culinary dishes, added to bathwater, or used in fresh flower arrangements.
- Crafting and Storage:
- Once dried, lavender can be used for making sachets, wreaths, and potpourri.
- Store dried lavender in airtight containers away from direct sunlight to maintain its fragrance and color.
Conclusion
With its beautiful blooms and calming scent, lavender is a delightful addition to any garden or home. By selecting the right variety, providing proper planting, and following these maintenance tips, you can enjoy the beauty and benefits of lavender for years to come. Happy gardening!